Sunprints: The Cyanotype Printing Workshop

How to Turn Sunlight, Water, and a Handful of Ferns and Wildflowers Into Gallery-Worthy Prussian Blue Prints You'll Be Proud to Frame

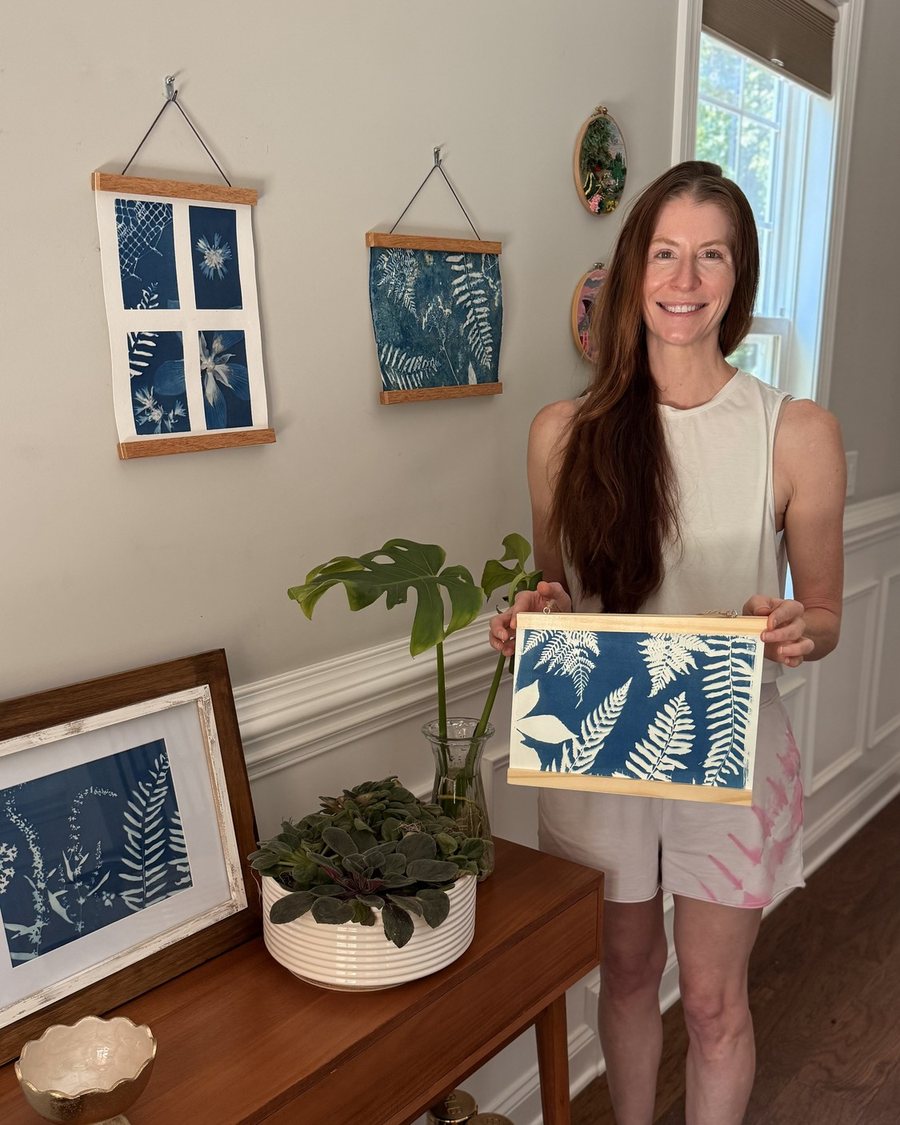
Kristi smiling and holding a framed ferns cyanotype print, standing beside a console table with more of her framed prints on the wall behind her

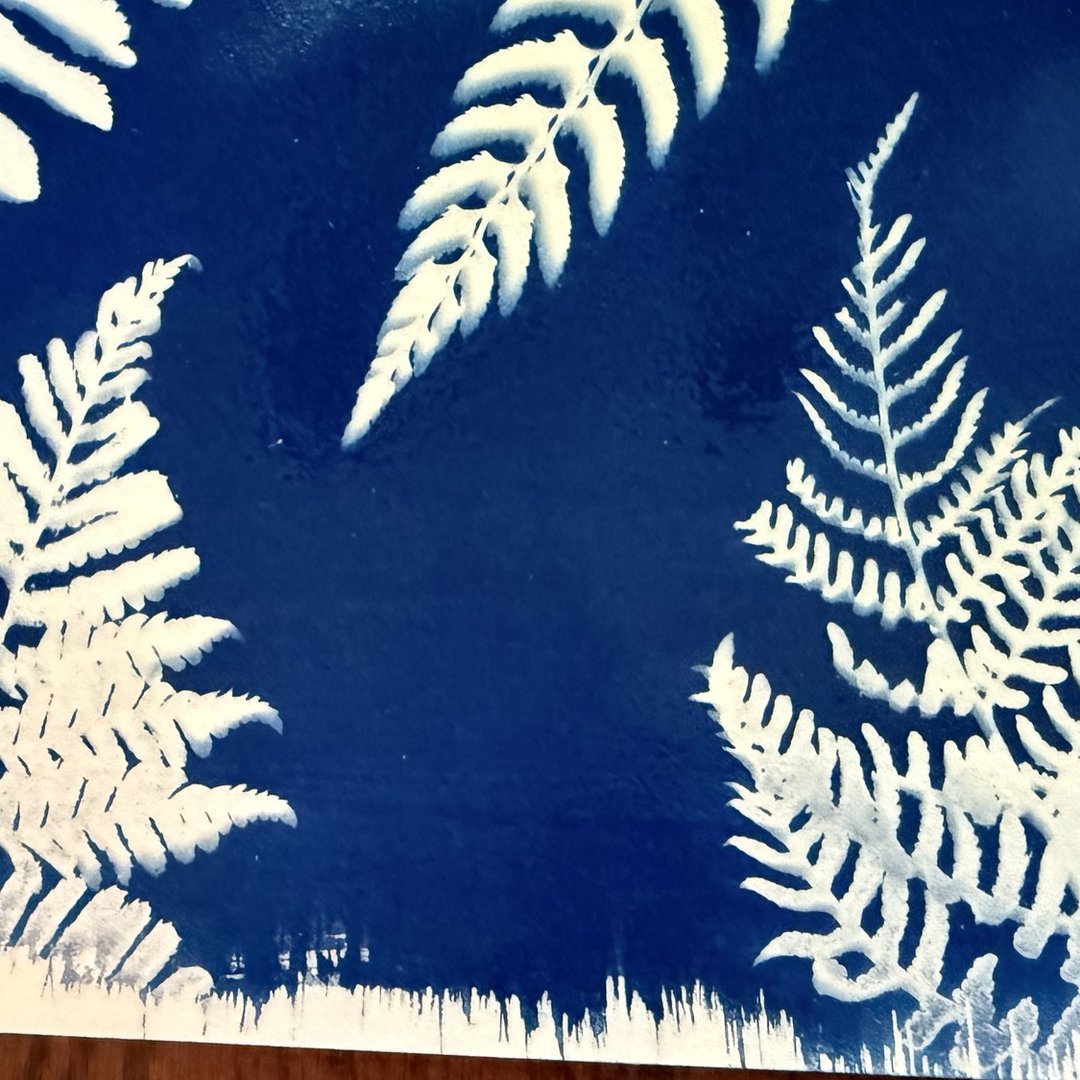
Imagine picking a handful of ferns and wildflowers from your neighborhood, laying them on a coated sheet of paper, and setting it out in the sun. Fifteen minutes later you carry it inside, lift the plants away, and slide the sheet into a tub of water at the kitchen sink. Deep, rich Prussian blue floods the page around every leaf, every stem, every delicate vein, and a ghostly white impression stares back at you, so crisp it looks like it belongs in a 19th-century botanical archive.

Imagine a wall in your home filled with blue-and-white botanical prints, each one more striking than the last. A friend walks in, stops, stares, and says, "Where did you buy these?" You pause for a second, smile, and say, "I didn't. I made them. With sunlight." The look on her face is the kind of thing you'll remember for weeks.

Imagine discovering that the entire process takes less than 20 minutes of hands-on work. That the supplies cost less than a dinner out. That there's no drawing, no painting, no artistic skill required at all. The sun does the printing. The water does the developing. You get to take credit for something that looks like it was pulled from a gallery wall.

Every Print Is One of a Kind

The same simple process looks completely different depending on what you lay down. Ferns from beside the driveway, a hibiscus from the garden, a few cosmos, a stem of Queen Anne's lace from a walk, even a lace doily from the drawer. Your botanicals become your palette.

Three before-and-after pairs: fern fronds on cream linen above the ferns cyanotype they become, a pressed pink hibiscus with small cosmos above its Prussian blue print, and Queen Anne's lace with a fern and cosmos above the mixed botanical print

Why Cyanotype Looks So Impressive... And Is Way Easier Than You Think

The first time you see a deep, Prussian blue cyanotype (how to pronounce: SIGH-an-oh-type) print, it doesn't look like something a person made at home. It looks like something pulled from a 19th-century botanical archive. And your first thought is probably, "That's gorgeous... but I could never make that."

Here's why you can.

You don't need to draw. You don't need to paint. You don't need a photography degree or a single day of art school. The sun does the printing. The water does the developing. Your only job is to lay a plant on a sheet of paper and step outside.

And the supplies fit on one small kitchen shelf. Two compounds that cost less than a dinner out, a single foam brush, and whatever catches your eye on a walk around the block, on a hike, or in your own front yard.

That fern growing beside the driveway? That's your next print.

Two photos of Kristi Thompson, the Sunprints instructor: holding three of her finished cyanotype prints in front of a wall of framed prints, and a close-up of her smiling with a cyanotype-printed tote bag

Kristi Thompson

Hi, I'm Kristi Thompson. I'm a gardener and a gatherer, and I love combining my hobbies. Most of the flowers you see printed on my totes and scarves come from my own garden.

Mornings are a ritual for me. I go out to greet the day, collect whatever is blooming, and take a moment to myself. Some of those flowers get hammered onto fabric. The rest end up in cyanotypes, where the sun does the work and I get to watch the blue come up in the rinse.

I gather on walks and hikes too, and I keep a drawer of pressed flowers going year-round. Ferns are by far my favorite, but I'll print anything with an interesting shape that lies flat, a lace doily included.

This workshop is the whole process in one place, including the mistakes I made early on. If it saves you a few pale, washed-out prints and gets you to that first rinse a little sooner, that's all I want. Thank you for joining me.

Introducing Sunprints: The Cyanotype Printing Workshop

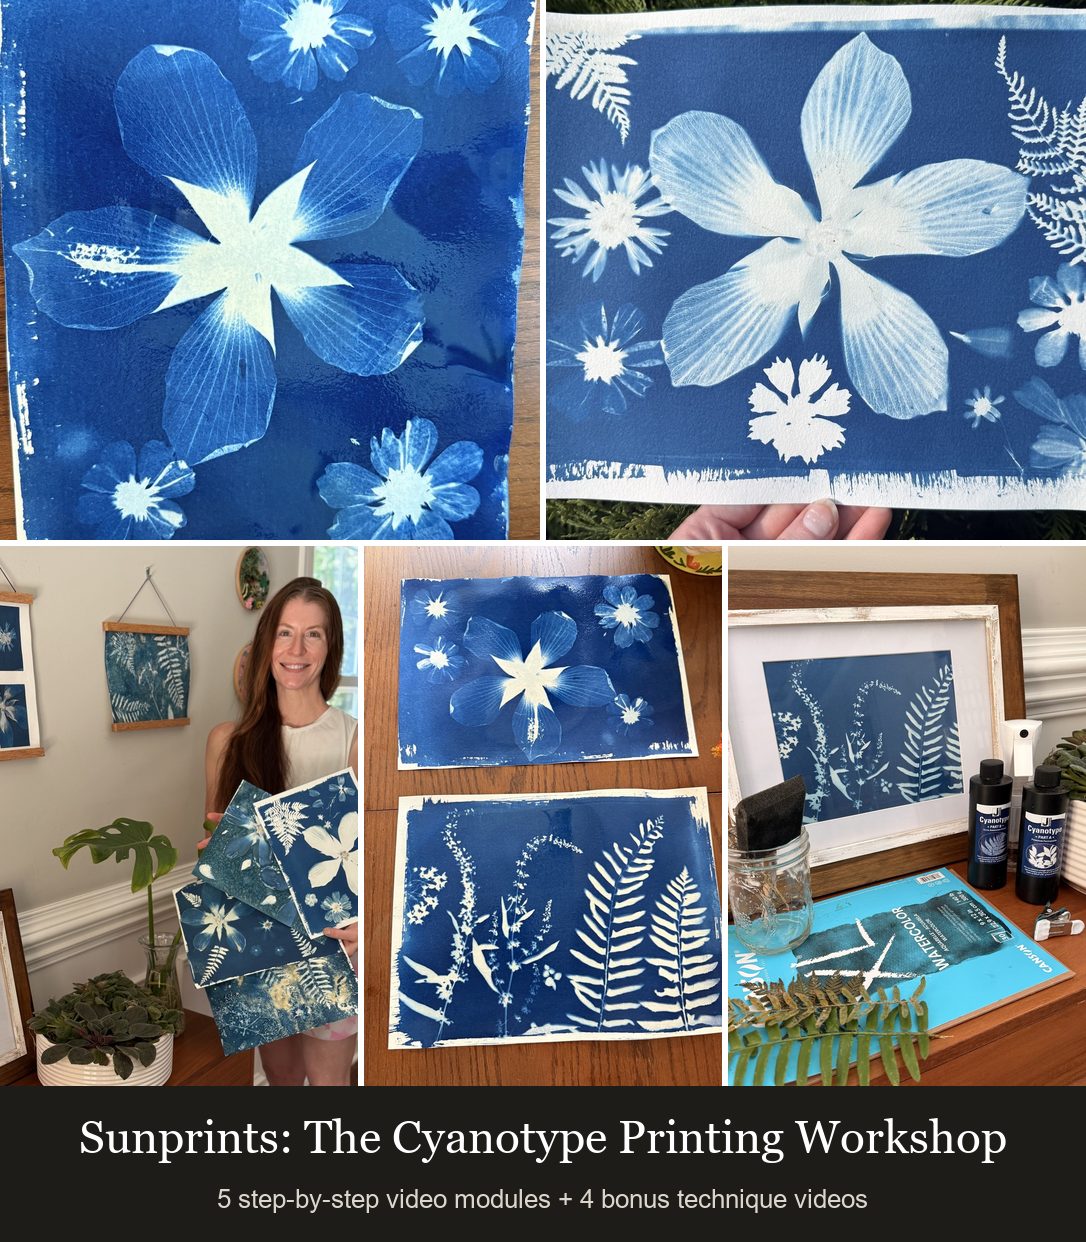
Sunprints: The Cyanotype Printing Workshop, a collage of real results from the course: a large hibiscus cyanotype print, a finished floral-and-fern print held up outdoors, Kristi smiling and holding three finished prints, two just-rinsed prints on a table, and a framed ferns print beside the Jacquard kit and watercolor pad, labeled 5 step-by-step video modules plus 4 bonus technique videos

Sunprints is a complete, step-by-step video workshop that takes you from an unopened box of supplies to a finished botanical print you can hang, in the exact order Kristi does it at home. No fluff. No history lectures. No guessing at what her hands are doing off camera.

Every step is filmed in real time at her table, on her driveway, and at her sink: mixing the sensitizer, coating the paper, laying out ferns and fresh flowers, watching the exposure turn from green to silver, and developing the print in a tub of water. You also see the small mistakes as they happen (a leaf that needed longer in the sun, a fresh flower pressed too hard) and hear what she'd do differently, which is the part free tutorials cut out.

Then four bonus videos take the same chemistry off the paper and onto a canvas tote bag, a rock from the yard, a wet-process print, and a chemistry-free turmeric print.

What You'll Learn

Five video modules, filmed start to finish. Practical, hands-on, zero fluff.

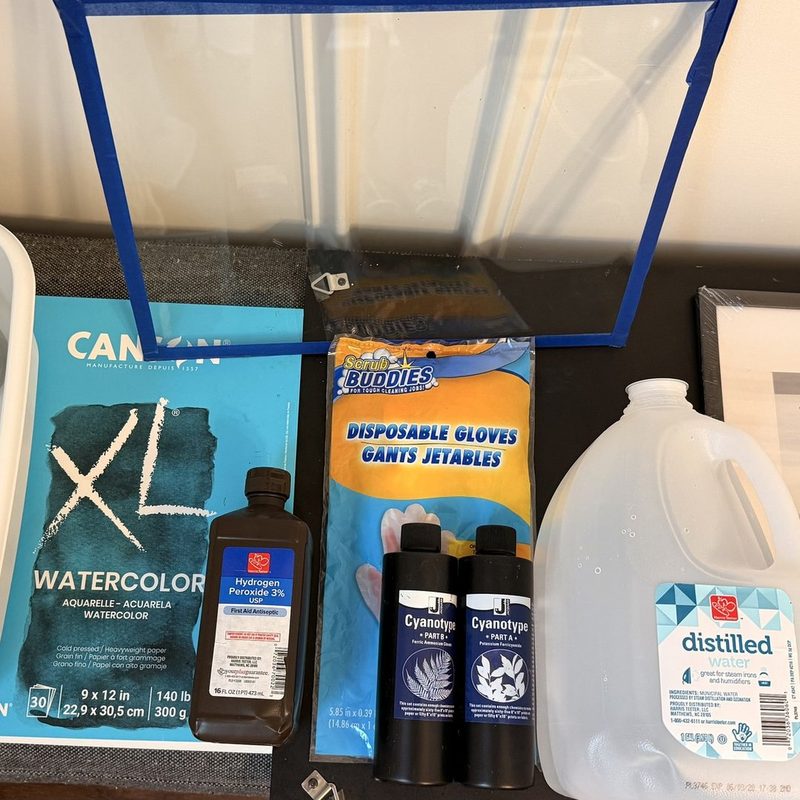
Module 1: Kristi's cyanotype supplies on the table: a 9x12 pad of 140-lb watercolor paper, disposable gloves, hydrogen peroxide, Jacquard cyanotype Part A and Part B, a jug of distilled water, and a glass frame

Module 1

Your Setup and Supplies

Everything you need before your first print, and nothing you don't. Kristi walks through her exact kit piece by piece, then shows you how to set up a room so nothing gets exposed before you're ready.

  • The two-part chemistry kit Kristi has always gotten her best results from, and the "add water and let it sit a day" step in the instructions that most beginners skip
  • Why your paper has to be thick 140-lb watercolor paper (Kristi uses a 9x12 pad) so it survives being fully submerged, when copy paper would fall apart in the rinse
  • The "cyanotype sandwich" of board, paper, glass, and binder clips, and why the clips matter more than anything else on the list (the tighter the press, the more detail you capture)
  • Distilled water vs. tap water: why acidity and alkalinity quietly change how your print develops, plus the two-teaspoon peroxide spray Kristi keeps by the sink to speed up the final color
  • Which botanicals print best (ferns win by a mile), fresh vs. dried, why "flat and 2D" is the goal, and the cut-up doily trick that gives you texture no plant can
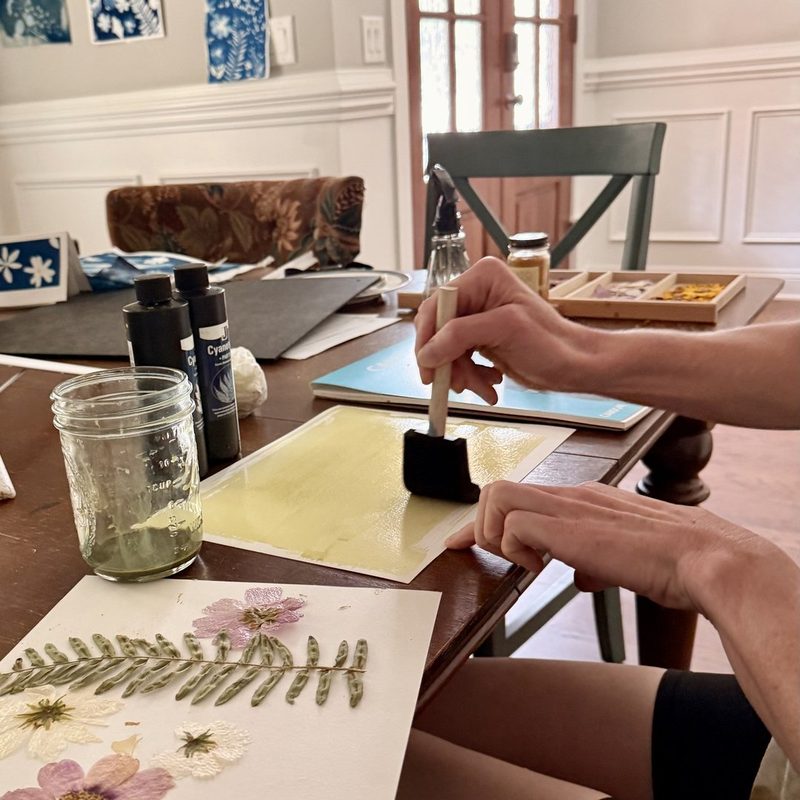
Module 2: Kristi brushing pale yellow-green sensitizer onto watercolor paper with a foam brush, pressed ferns and flowers waiting beside it

Module 2

Coating Your Paper

In a dim room you'll mix the light-sensitive solution (one capful of each part), then lay down the thin, two-pass coat that decides whether your finished print looks smooth or blotchy. Kristi shows you the wrong way first, so you'll recognize it instantly.

  • The equal-parts mix (one capful of Part A, one of Part B) and why you only ever mix what you'll use in the next couple of hours, so every sheet gets fresh, full-strength solution
  • Kristi's horizontal-then-vertical passes with a foam brush, and the "dab, shake off the drops, then coat" habit that keeps globs and pooling off your paper
  • What a finished coat should look like (a pale, lemony yellow-green), the fingerprint mistake that blocks exposure in patches, and painter's tape edges vs. the natural brushed border
  • Where to dry it and for how long (one to two hours in a dark room, no blow dryer, no peeking), plus the second-coat option for a deeper, darker blue
  • The painter's-tape grid that turns one 9x12 sheet into four small prints, so you can experiment or make stationery without burning through paper
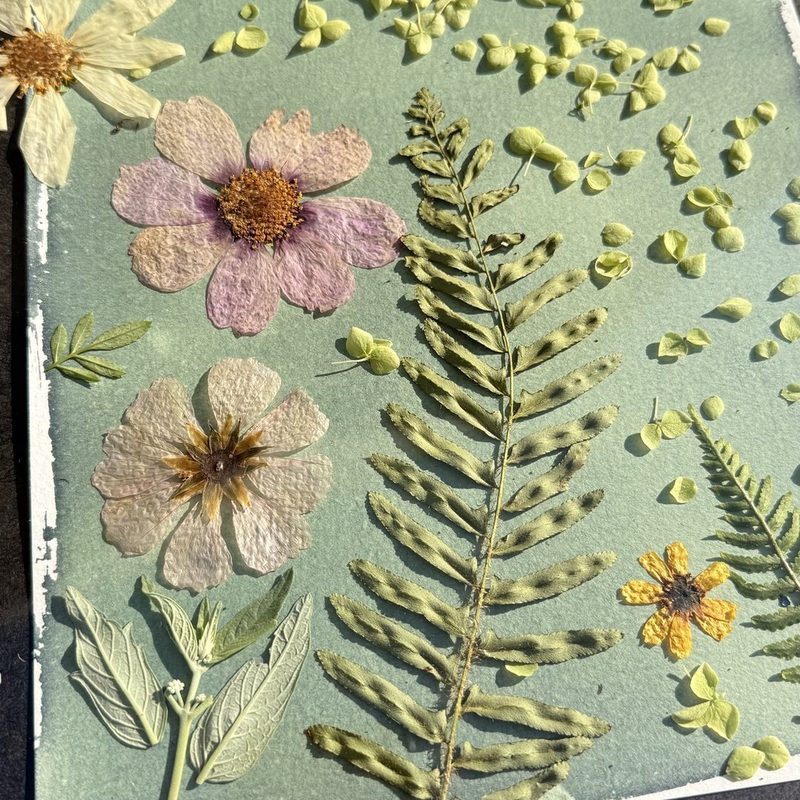
Module 3: pressed cosmos, ferns, and Queen Anne's lace arranged on a sheet of coated, green-tinted watercolor paper

Module 3

Composing Your Print

How Kristi lays out a print she's happy with in a few minutes, from choosing what to gather that morning to clipping the glass on and heading for the door.

  • Why both stations (composing and rinsing) get set up before the coated paper ever leaves the dark room, because once it's out you're on the clock, and the two things Kristi keeps at the rinse tub that most people forget
  • The freshness check that tells you in one glance whether a coated sheet is still good: what "still light green" means versus blue creeping in at the edges
  • Why ferns go face-down under the glass, when to let botanicals hang off the edge of the paper, and how negative space is what gives you the rich blue you're after
  • Fresh flowers vs. dried and pressed: fresh gives more contrast, but flowers are 3D, so you'll see how hard to press, how many clips to add, and when a broken petal is worth keeping anyway
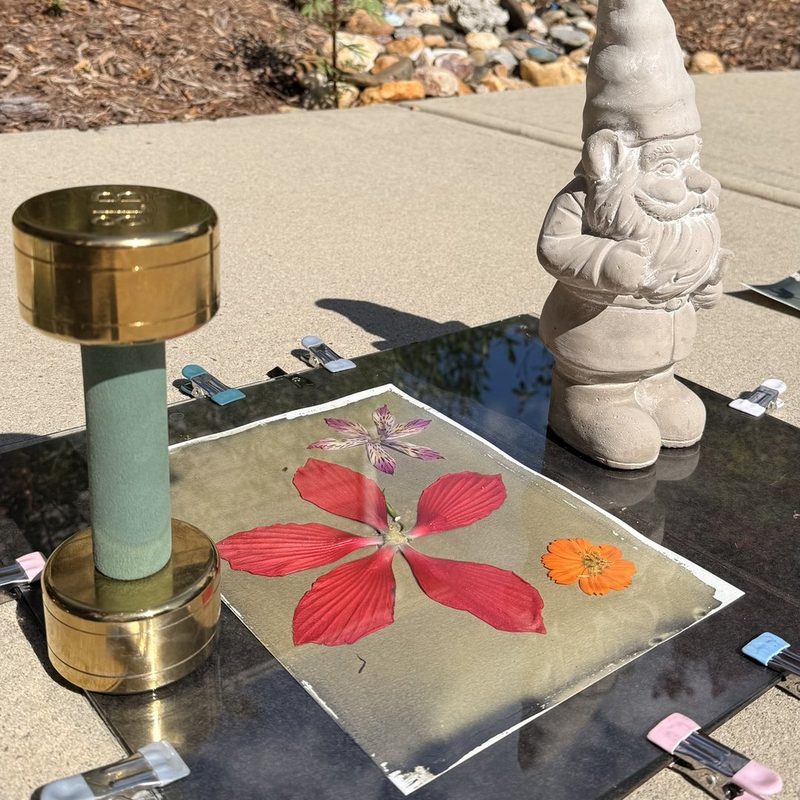
  • The taped-glass safety trick, the weights-and-yard-objects backup for when clips aren't enough, and why a single fern is the smartest first print on a high-UV day
Module 4: a coated print with a red hibiscus under glass on the sunny driveway, held flat with a brass weight and clips, a garden gnome standing beside it

Module 4

Exposing and Rinsing

There's no timer in Kristi's process. You watch the paper change color, pull it at the right moment, and get it inside to the rinse without losing a thing. This module shows you exactly what that moment looks like on a real print.

  • The three-color sequence (light green, then teal, then a silvery light gray) and which one means "done," so you never have to guess or set a timer
  • Why a strong, clear morning sun can finish a print in three to five minutes, and how to read the whole sheet instead of one corner before you pull it
  • The over/under balance: overexpose and the fine details wash away, underexpose and they never show up. Kristi walks the sweet spot on camera
  • The one thing you must never do while you're still outside (peeking under the glass), because a few seconds of open sun will wash out an otherwise perfect print
  • How to carry the whole sandwich back inside without touching the paper, so all that detail makes it to the rinse
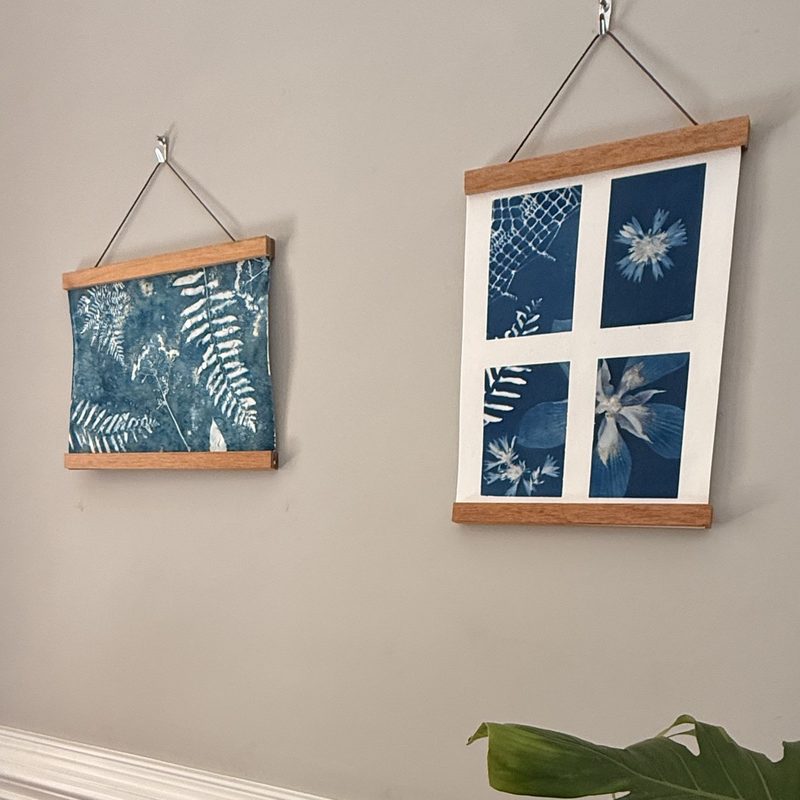
Module 5: two finished cyanotype prints hanging on the wall in wooden magnetic frames, a ferns print and a four-square grid print, with a monstera leaf below

Module 5

Drying & Finishing

This is the moment that makes people fall for cyanotype. You'll develop the print in a water bath, watch the Prussian blue deepen in front of you, then dry, flatten, and hang it so it stays that way.

  • Why the print comes apart indoors in a darker room, and how Kristi slides the botanicals off and eases the sheet into the bath without her fingers ever touching the image (a pair of old chopsticks does the work)
  • How many baths it really takes (two or three), how to tell when the chemistry has stopped coming off, and the paper-towel check for leftover sensitizer that would keep exposing after you're done
  • The peroxide "cheat" Kristi admits to: one quick spray jumps the print straight to its deep, 24-hours-later blue so you see the final result immediately (and why you rinse it right back off)
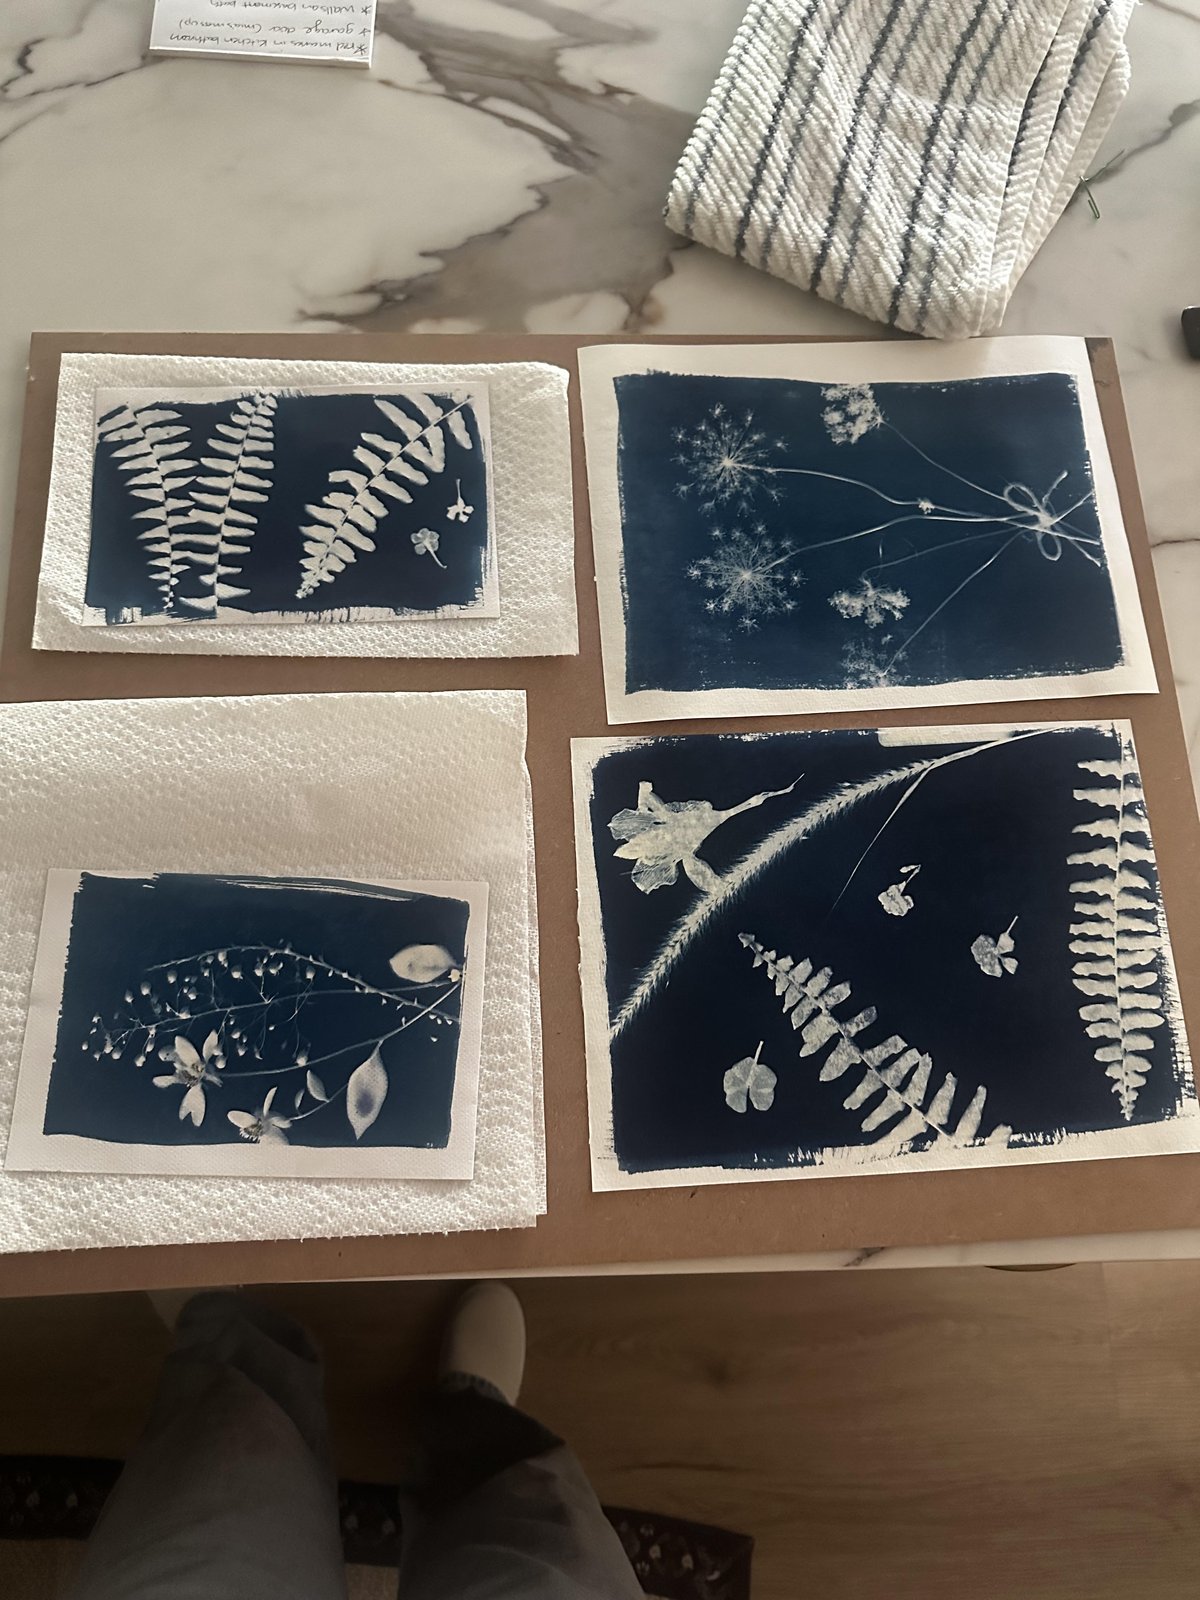
  • Reading a finished print like Kristi does: which flower came out overexposed, which one under, why a mixed composition is always a compromise, and the happy accident of flower bits dyeing the paper yellow
  • Drying flat, pressing under a book with a weight, hanging with magnetic wooden strips, and the direct-sun rule that keeps the blue from fading (plus the room-swap trick that can revive a faded print)

4 Free Bonuses (Included Today)

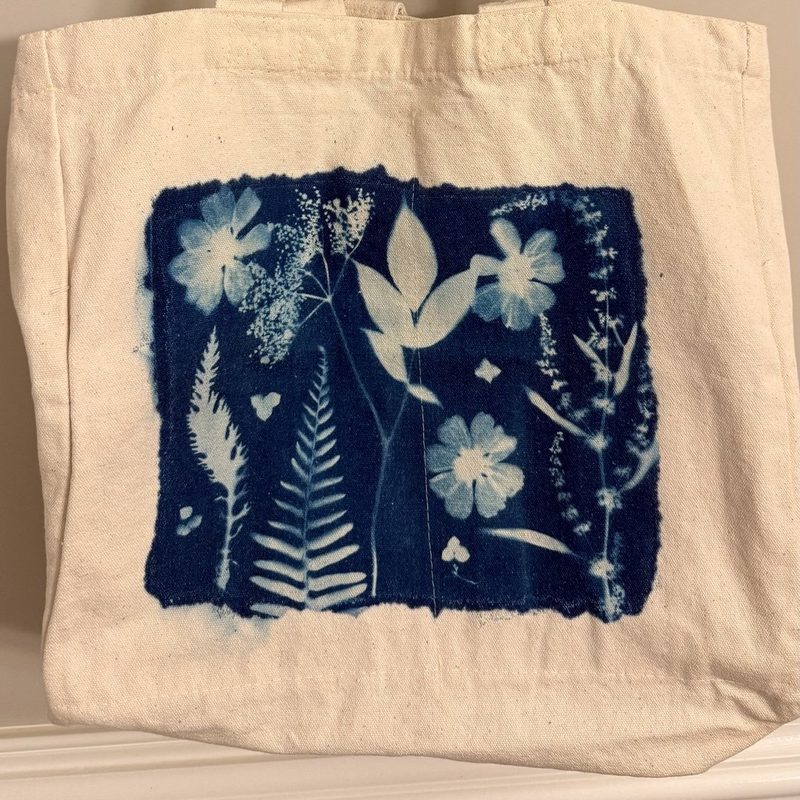
Bonus 1: a finished canvas tote bag with a deep blue cyanotype panel of ferns and flowers, hanging on a wall hook
01$37 Value. Yours FREE

Printing on Fabric

Same chemistry, same foam brush, new canvas. Kristi coats and prints a plain tote bag you'll actually carry, start to finish, including every part that works differently than paper.

  • Why fabric drinks up far more sensitizer than paper, and the "two thin passes beat one muddy pass" rule for working it into the weave
  • The plastic-bag liner that stops sensitizer bleeding through to the other side of the bag (and why cardboard is the wrong stand-in)
  • How far the coat spreads on canvas (about a quarter to a half inch), why you should print it soon after it dries, and the board-in-the-bag trick that pulls the fabric taut under the glass
  • Exposure on fabric: minutes for a clean silhouette, much longer if you want leaf veins, plus the "hand washing machine" rinse and the water-runs-clear test that tells you it's done
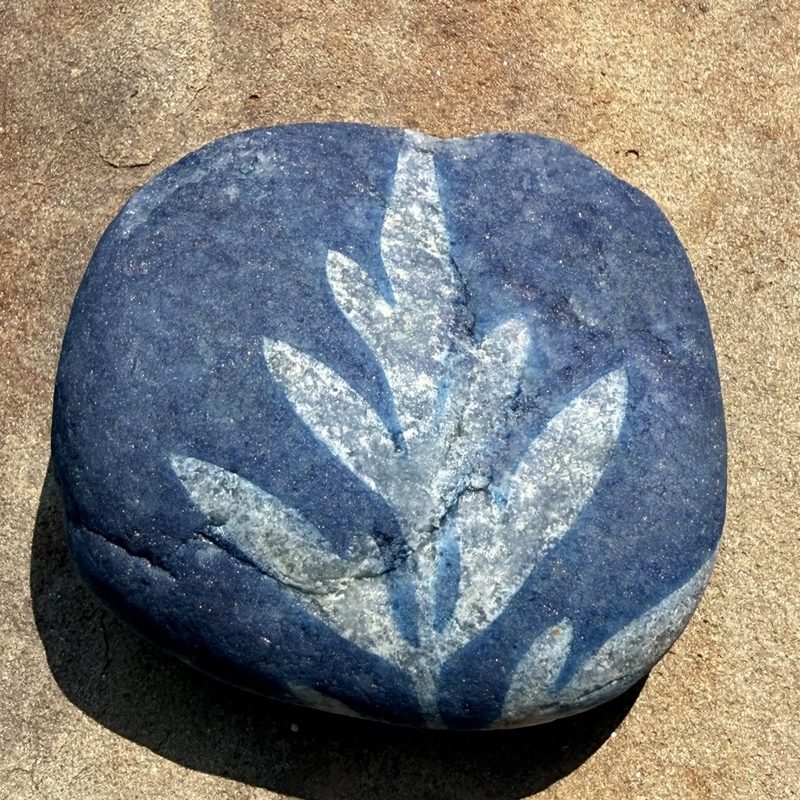
Bonus 2: a smooth gray rock with a pale fern silhouette printed on it in cyanotype blue
02$17 Value. Yours FREE

Printing on Rocks

Kristi shows why stone behaves differently, how fast it exposes, and how to keep from overcooking it.

  • Which rocks to look for (smooth, light, not too porous) and why a simple leaf or flower beats a fern when your surface isn't flat
  • Plastic wrap instead of glass: how to wrap and twist it tight so the botanical works as a clean resist on a curved surface
  • Why a rock can be done in about five minutes at midday, how to "chase the sun" so every side gets light, and the silvery color cue that means pull it now
  • What it means when the coating seems to vanish outdoors (you've gone too far, but it will still develop inside), and the peroxide finish that brings the silhouette up
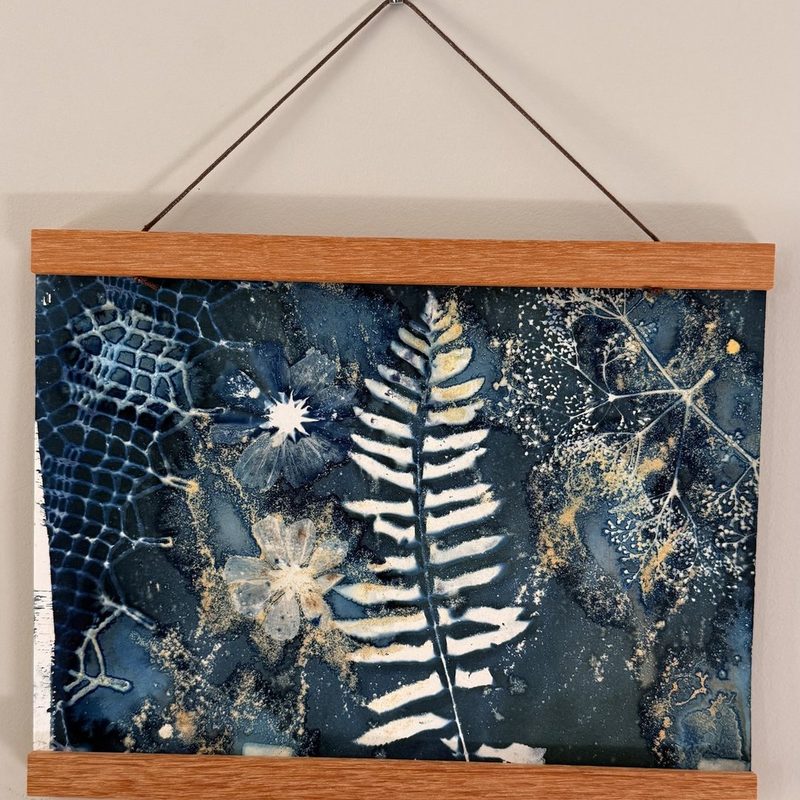
Bonus 3: a framed wet cyanotype hanging on the wall, dark mottled blue with a white fern and flecks of gold from turmeric
03$27 Value. Yours FREE

Wet Cyanotype Printing

The looser, more painterly version of the process. You skip the drying step, expose the sheet while it's still wet, and let a few pantry ingredients (salt, vinegar, a pinch of turmeric) push the chemistry around.

  • Why this print goes outside wet, why a heavier coat is fine here, and what happens when kosher salt, a mist of plain vinegar, and a light dusting of turmeric hit the sensitizer
  • The two-hour exposure and Kristi's rule for this style: when in doubt, go longer, because an underexposed wet print is just a white blob
  • What the salt leaves behind (tiny crystal speckles), what the turmeric turns into once rinsed (gold flecks instead of brown), and how to soak away the sediment without rubbing the print off
  • Reading the result: unpredictable gradients and dreamlike splotches are the whole point, plus the bubble variation if you want to push it further
Bonus 4: a framed turmeric sun print hanging on the wall, a rust-orange Queen Anne's lace silhouette on pale yellow paper
04$27 Value. Yours FREE

Printing with Turmeric

A sunny day, a jar of turmeric, and some rubbing alcohol. No sensitizer at all. Kristi's go-to when the chemistry runs out but the light is too good to waste.

  • How to mix a turmeric-and-rubbing-alcohol sensitizer from the spice cabinet, and why straining it through a coffee filter is worth the extra minute
  • Why this coat is so easy to overload (and how light to go), why it dries faster but exposes slower, and the ventilation note for anyone sensitive to the smell
  • The one-to-two-hour exposure and the baking soda "rinse" that replaces water: brush it on and watch the yellow shift to a warm burnt orange as the print sets
  • Where binder-clip marks and sediment spots come from, and how a turmeric print sits next to your blues in a frame set

For Just $47 You Get Everything

The full price of Sunprints: The Cyanotype Printing Workshop is $97. But that's not the price you'll be paying today.

The page you're looking at right now is a beta test. I've poured everything I know into this workshop: every technique, every shortcut, every little detail I've figured out since my own first pale, washed-out prints. And I want to make sure every single student who joins gets the personal attention they need to actually finish a print they're proud of.

I'm honestly not sure I can give that level of support to more than 100 people at once. So I've decided: the first 100 students get in at a fraction of the $97 price. If this page is still live, you can get instant access to the complete workshop, all five modules, and every bonus for just $47.

Sunprints: The Cyanotype Printing Workshop course bundle
  • The Complete Sunprints Cyanotype Workshop $97 value
  • Bonus: Printing on Fabric (video) $37 value, FREE
  • Bonus: Printing on Rocks (video) $17 value, FREE
  • Bonus: Wet Cyanotype Printing (video) $27 value, FREE
  • Bonus: Printing with Turmeric (video) $27 value, FREE
Total Value: $205
You Pay: $47

ONE-TIME PURCHASE. LIFETIME ACCESS FOREVER.

Get Lifetime Access to the Sunprints Workshop

Lock in the reduced beta price before the first 100 spots are gone.

Secure Payment 256-bit SSL 30-Day Guarantee PayPal Visa / MasterCard

Maybe You're Thinking...

"But I'm not artistic at all."

You don't make the art. The sun makes the art. You arrange a few leaves on a piece of paper and step outside. If you can pick up a fern and lay it flat, you already have every skill this process requires.

"Are the chemicals safe?"

Safer than bleach. Safer than hair dye. Two mild compounds that schools use in kids' art classes. No fumes, no special ventilation. Kristi wears gloves, but mostly so her fingers don't stay blue for a few days. The word "cyanide" in the name refers to the chemical's structure, not its toxicity.

"I don't have a garden."

A sprig of fern from a houseplant. A $3 grocery-store bouquet. A few stems picked on a walk around the block. Most of Kristi's own prints start with what grows beside her driveway and a drawer of flowers she has pressed over the years.

30-DAY GUARANTEE

30-Day Money Back Guarantee

You don't have to make the final decision now. Get instant access to the full Sunprints Workshop right now and try it out. Watch the videos. Follow along with Modules 1 and 2. Mix your first batch of sensitizer, coat a sheet, and make your first print. If at any point within 30 days you decide it's not for you, for any reason at all, just send a quick email and you'll receive every penny back within 24 hours. NO QUESTIONS ASKED. No hoops to jump through. No awkward conversation. No guilt. You either love what you create or you get a full refund. That's it.

Frequently Asked Questions

The moment you click the button and complete your purchase, you get instant access to every module, every video, and every bonus. The course is completely pre-recorded, so you can start right now at 2 AM or next Saturday morning, whatever works for your schedule. Watch one module a day or binge the entire thing in one afternoon. There's no schedule to follow and no deadlines to meet.

None at all. Cyanotype doesn't involve drawing, painting, or any traditional art skill. The sun creates the image; you arrange the plants and follow the process. Kristi's own early prints came out too pale, and she shows you the mistake so you can skip it.

A two-part cyanotype kit (Kristi uses Jacquard Part A and Part B, roughly $20 to $30 online or at a craft store), a pad of thick 140-lb watercolor paper ($10 to $15), a foam brush, a glass jar you'll never use for food again, binder clips, a sheet of glass or an old picture frame with a flat board underneath, and a cheap plastic dish pan for rinsing. Optional extras: disposable gloves, distilled water, and a spray bottle with a little hydrogen peroxide. Starting from scratch runs roughly $50 to $75, and after that you're only replacing paper and sensitizer. A printable supplies list comes with the course.

Cyanotype is one of the safest photographic processes. Ferric ammonium citrate and potassium ferricyanide are two of the mildest chemicals used in any alternative printing method. No fumes, no special ventilation needed. Elementary schools use this exact process with children. Just practice normal kitchen caution: don't eat the powder, keep it away from pets, and rinse your hands after handling. The word "cyanide" in the name refers to the compound's chemical structure, not toxicity; it's chemically stable and non-toxic in this form.

The five core modules run under an hour in total, and the four bonus technique videos add about 45 minutes more, so you can watch everything in one sitting. Your first print is an afternoon project: coat and dry the paper (one to two hours in a dark room), a few minutes in the sun, a short rinse, then a lay-flat dry. Come back for the bonus techniques whenever you're ready.

One-time payment. One hundred percent. No subscriptions, no monthly charges, no hidden fees, and no "premium tier" waiting on the other side. You pay once and you own access to the entire course and all bonuses permanently.

You're covered by a full 30-day money-back guarantee. If the course isn't for you for any reason, just send one email and you'll have your money back within 24 hours. No questions asked. No forms. No awkward conversation. We take on all the risk so you don't have to.

Forever. Lifetime access means exactly that: you can watch and re-watch every module as many times as you want, whenever you want, for as long as the internet exists. If we ever update or add new content, you get that too at no extra charge.

The entire course is video-based. You watch Kristi demonstrate every step in real time: mixing, coating, composing, exposing, and rinsing, plus the four bonus technique videos. Every lesson is filmed so you can see exactly what her hands are doing and follow along at your own pace. You also get a printable supplies list. Everything is accessible on your phone, tablet, or computer.

Free tutorials give you fragments. A 10-minute video on "how to do cyanotype" skips the invisible details that make or break your prints: coating thickness, paper selection, humidity management, exposure timing, and rinse technique. This course is one continuous, structured process filmed start to finish by one person, with the mistakes left in and explained. You don't have to piece together conflicting advice from 15 different creators and hope it works.

Completely. Your payment is processed through a secure, SSL-encrypted checkout page using trusted payment processors including PayPal, Visa, Mastercard, and American Express. Your credit card information is never stored on our servers. It's the same level of security you'd experience buying from any major online retailer.

Ready to Turn Sunlight and a Handful of Ferns Into Your First Piece of Wall Art?

I hope you'll love your first afternoon of printing as much as I still love every one of mine. There's something about watching a deep, saturated blue appear on a plain sheet of paper that I don't think I'll ever stop finding magical. Looking forward to seeing what you make.

Kristi Thompson

ONE-TIME PURCHASE. LIFETIME ACCESS FOREVER.

$97 $47
Get Lifetime Access to the Sunprints Workshop

Lock in the reduced beta price before the first 100 spots are gone.

Secure Payment 256-bit SSL 30-Day Guarantee PayPal Visa / MasterCard